 Diamond Pattern Slate Floor
Project of Roy
& Jeff
Diamond Pattern Slate Floor
Project of Roy
& Jeff
Slate designed and made by The Capozzolo Slate Co. of Bangor PA
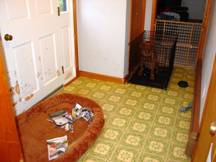
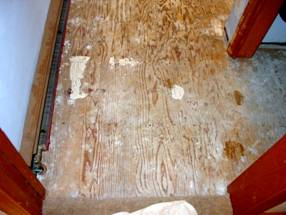
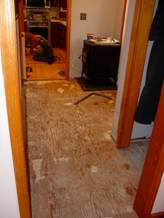
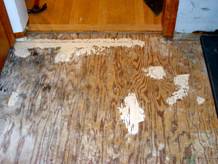
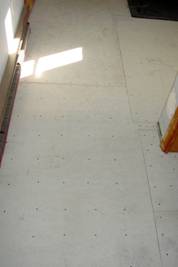
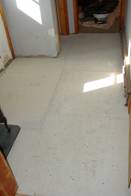
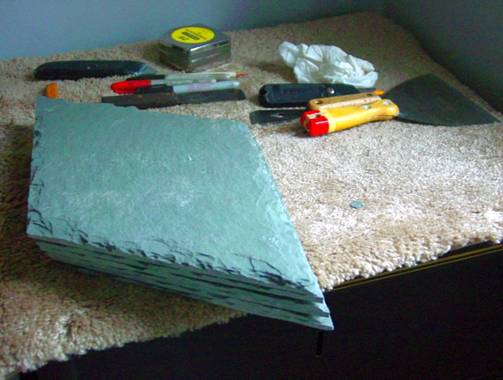
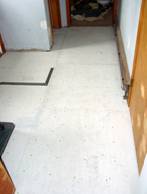
This whole project came about when the house my son (Jeff) and I (Roy) live in had the foyer floor ripped up after an overly zealous Hungarian Vizsla dog destroyed the floor that was already there (see pic), actually in both the foyer and complete kitchen. He somehow managed to rip up the no-wax floor that my grandfather had installed in the house back in the 70’s. It was time to go anyway, he just expedited the matter. So, in the kitchen we installed an antique reclaimed oak hardwood floor, which I had bought and we then ripped out of an old building in Allentown, PA, ca 1910 or so. The wood floor was re-planed and then installed in the kitchen. This left the foyer to be done, and we had not decided what to install there, although we were both leaning towards a ceramic tile of sorts. Then one Saturday morning, I suggested to Jeff that I was really thinking of some kind of a unique floor for the foyer, and then I mentioned a slate floor, and Jeff said he thought that would be a great idea, so we went shopping all day, looking far and wide for some kind of unique slate flooring. At that time, Jeff mentioned he knew a guy who was an acquaintance he met a while back, and how this person had taken him to his family slate quarry and farm, the Capozzolo’s. So he made some phone calls, and the following Saturday we ventured up to Bangor, PA, to check out the Capozzolo slate quarry and farm, where we had met the Capozzolo brothers, in particular, Uncle Charlie and John, as well as nephew Joason. We told the guys that we had a small foyer, only 60 square feet area we wanted to install a slate floor into. Eventually, Uncle Charlie showed us a unique sample of a roughly 4’x4’ slate prototype floor that Charlie had experimented with some time back, the no-gap, but jointed diamond shaped floor, with a 6-pointed star pattern as the base image/layout. Both me and Jeff thought that this floor was most likely the unique floor we were looking to install, so, we told Charlie that we would commit to the floor, he should gather up the pieces for same, to cover 60 square feet, and we would be back to pick it up when he had all the pieces.
Some of the below outline was inspired by the internet site doityourself.com , and the article on installing slate written by Brian Simkins, and is copyrighted by DIY, but most all of this is my own writing etc. and does not infringe on that copyright.
Brian Simkins is a freelance writer living in Chicago. He enjoys using his 14 years of home improvement experience to educate and equip new home owners.
Some tools and things you may need to do the job (most or all are highly recommended):
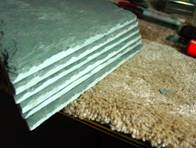
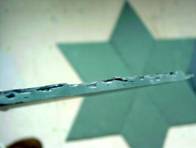
- Slate: In our case here, this is a custom cut slate, diamond shaped, 60 degree points at the long ends, overall point-to-point dimension of approx. 17.250” and approx. 3/8”-7/16” thick.
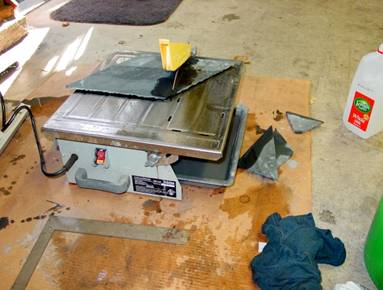
- Wet Saw: When installing slate tile, you will need a diamond bladed wet saw (uses tap water). These are available to rent at most tile shops or tool rental centers.
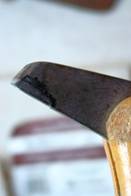
- 12 oz claw hammer: You will use the hammer when removing moldings and securing the subfloor, and a myriad of other uses, so keep it handy.
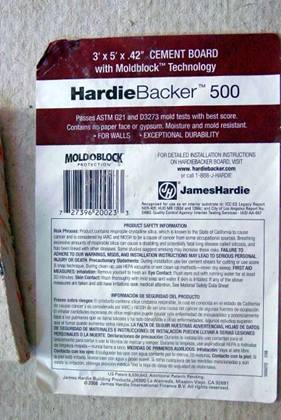
- Tile Underlayment/Backer board/Wonderboard (concrete based): If you are installing over a wooden subfloor like in our project, then you will need to install a cement based backer board. This will provide the proper surface for your adhesive and slate to adhere to.
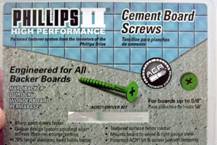
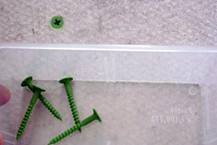
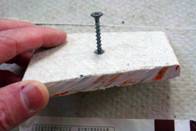
- Drywall screws or cement board screws: To secure the backer board to the wood under-floor, we used 1-5/8” long coarse thread drywall screws.
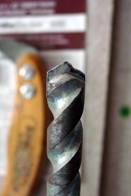
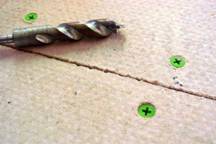
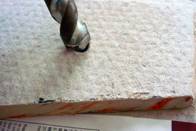
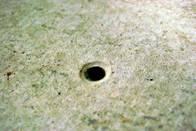
- Cordless Drywall Drill/Driver: Used to pre-drill a countersink for the drywall screws, if used, this way, the heads were below the surface of the backer board. The cement board screws will do their own countersinking, but they are expensive, so if you want to save some coin, use the drywall screws and pre-countersink using the ½” carbide or masonry drill bit, and with this, you will only be using the TIP of the drill to do a quick countersink operation, NOT REALLY DRILLING a hole!
- ½” masonry bit: See the pics, this is used as a countersink on the concrete based backer board.
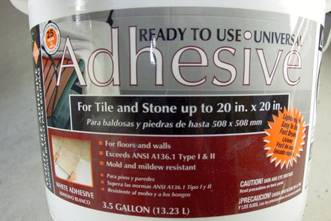
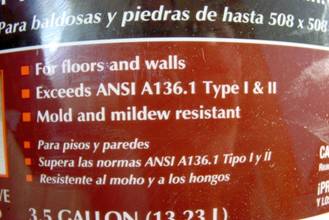
- Tile Adhesive: This is the adhesive (glue) that you will use to secure the slate to the underlayment or backer board.
- Tape measure: Keep it on your belt, as you are going to need it constantly.
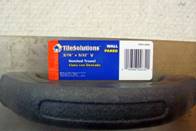
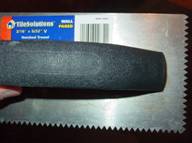
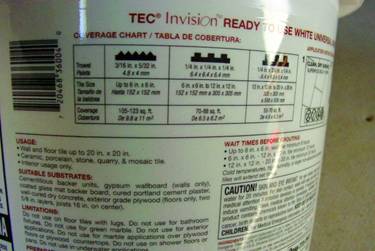
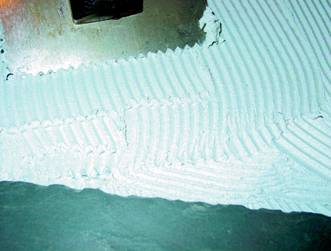
- V-Notched Trowel (3/16” x 5/32"): This trowel will be used to spread the adhesive used for this particular floor application. A trowel with 3/16” x 5/32" V-grooves, as we found from doing it, seems to work out OK, you may want more adhesive if you have more of an uneven surface or the slate backs are uneven beyond 1/8”.
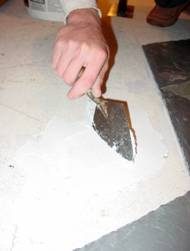
- Small Bricklayers Triangle Trowel: see the pics, this tool was my Dad’s, comes in quite handy for dipping out adhesive etc., keep it handy!
- Small 1” wide spackle knife: This comes in handy all around, for lifting up the slates, to wiping off the trowel, to a myriad of other uses, keep it nearby.
- Knee Pads: Saves you from surgery in the future. Don’t be too proud to wear them.
- Eye and Ear protection: See the pics – you need these when you use the wet saw. Don’t thing you are a wuss if you use them.
- 48” straight-edge: You will need this to mark your center points and guidelines on the floor.
- Black Sharpie permanent markers: These will be used for marking around the slates and also for marking the slate directly for making the cuts.
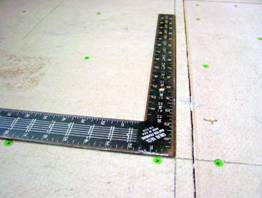
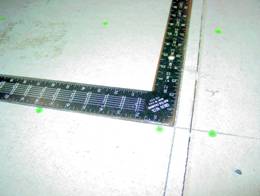
- Carpenter’s Square: You may need this to check on the squareness of things, like the original corners of the walls etc…a handy tool, buy one if you don’t already have one.
- Sponge or terrycloth rag and bucket: A big commercial sponge and a 3-5 gallon plastic bucket will be necessary for wiping up excess adhesive from the face of the tiles.
- Utility knife: This will be needed to trim things, especially the underlayment backer board etc.
- Carbide tipped backer board knife: This is a special tool that works well and won’t dull like a utility knife when you cut the backer board.
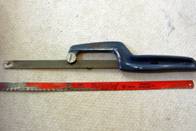
- Handsaw(s): You will need some type of a handsaw to cut out underneath doorjambs. What worked well for us was a hacksaw blade with holder. This way, you can flex the blade and get into places that a bigger saw can’t get to. They do make a special saw just for this, if you want to look around for one, but you can usually get away with the hacksaw blade (24 teeth per inch).
- Sealer: In order to increase the life and stain resistance of slate, it should be sealed occasionally. Refer to the instructions on the label to determine frequency.
- Paint Roller/Paint Pad: This will be used to apply the slate sealer.
|
|
|
|
|
|
Backer Board Label |
Carbide Tipped Knife & ½” Carbide tipped drill bit |
Cement board screws |
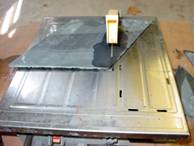
Diamond Blade Wet Saw |

|
|
|
|
|
|
Pre-Countersinking for Drywall screws |
Trowel |
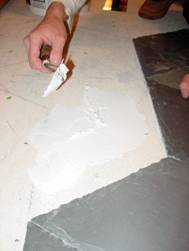
Adhesive |
Adhesive |
Some Background
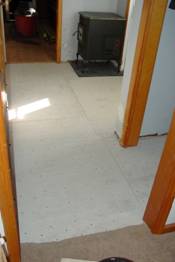
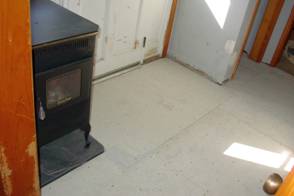
We are not professional floor installers, just a bunch of handy guys who have lots of tools and common sense, with a sense of adventure, experimenters, and a flair for things with character (ergo the Vizsla dog etc.). We has an opportunity with this project to do something that would last and endure, would come from a local source, match the base of our corn stove (yes, we have been burning corn for over 10 years now…email me if you want more info on that…). Since the Capozzolo slate quarry and farm is only about a half hour away, we thought it only fitting to go with what they had, and stay away from commercial outlets etc., kinda give it that homey feel all around. The other thing that was attractive to this endeavor is that this floor does not require grouting. I suppose you could install it leaving a grout gap, but we went without, as it seemed more appropriate.
The subfloor
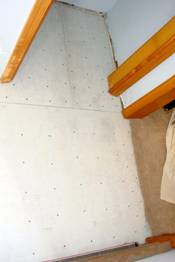
Here is where you need to use your head and make sure that the floor is quite robust and sturdy, or else bad things will happen to the floor down the road, we are told. In our case, we had a constraint that we wanted the top of the slate to be even with the top of the hardwood kitchen floor, so we only had about ¾” to play with. The base floor on top of the joists was ½” plywood. We went down into the basement and assessed the structure of the joists and the spacing etc. With only ¾” of room, and having about 3/8” of tile thickness, that only left about 3/8” of gap for the backer board. There are all kind of ways to see if the floor is strong, one is to get a few people on it and jump up and down and fell it, etc…but what we saw in the basement for the joist spacing, and the fact that the foyer was very close to the outside edge of the house, we opted to just go with a layer of 0.42” [close to 7/16”] backer board, and then we would come very close to being perfectly even with the hardwood kitchen floor. In many places, the joists under the foyer were doubled and tripled, with your basic 16” on center all around, so the floor was pretty jump proof for us. Just under the corn stove it was triples and close, the joists, so this gave us even more confidence of the robustness. Also, this foyer is not used for the main entrance to the house, we only use it for bringing in the corn, so the traffic is light at best. For our floor, we opted to use the same adhesive we intended to use for the slates, to also glue down the backer board, this for an extra measure of robustness. For that, we used a same trowel with the V notches that we intended to use for the slates, this we thought would not add to the overall thickness of the floor. There was enough roughness in the plywood to absorb the layer of adhesive and not add to the height of the floor. We did have to fill in some knotholes etc. and let those areas dry before we installed the backer board. If you use the HardiBacker brand like we did, we found that in order to get nice edges and breaks, we ended up using a hacksaw blade to cut that, as it didn’t always break off clean. The hacksaw we used to cut the doorjambs, we also found handy to make the cutouts for the pipes etc. in the backer board. Of course, the HardiBacker brand board is almost all cement, so it is hard on the blades, so you should make sure you have a supply of fresh hacksaw blades on hand, you will go through about half a dozen until you are done. We tried a 32T and a 24T, and found the 24T worked better for this.


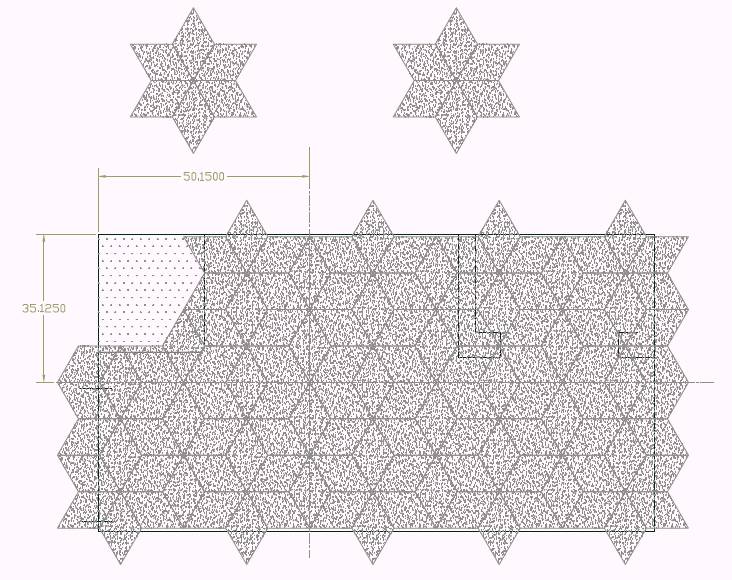
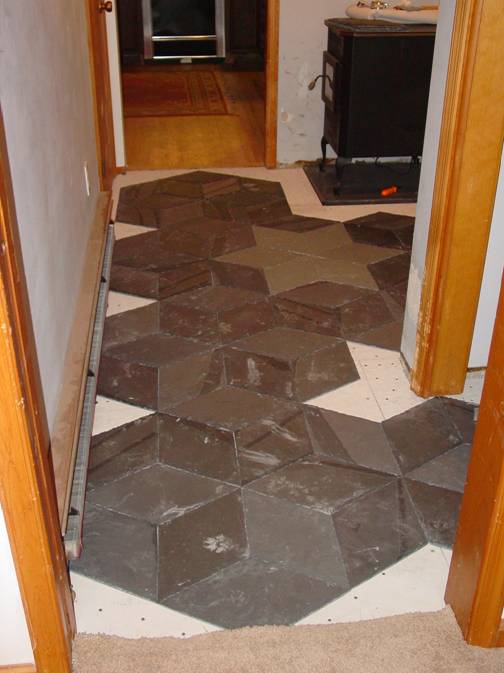
Plan Your Slate Layout
Since Roy is an engineer by nature and trade, it made sense to lay the color
out using a CAD package, to make sure of how many slates were needed and to get
a feel for how many cuts there were needed.
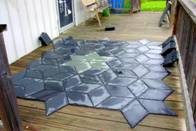
Seen here is an image of the layout we went with from the CAD package
(AutoCad). We used this to derive the center of the layout and installation.
Since the tiles are so symmetrical, it is possible to configure them in quite a
few ways, and some of those ways were tried, but we felt the best looking
layout is the one that Charlie Capozzolo has originally proposed to us. It was
then the awe also decided to go with the Vermont Green slate star for the
center of the floor design. Once we had this layout on paper, the centerlines
were struck with a utility knife on the backer board, then we laid out the slates
dry, in the proposed pattern, and adjusted the position and centerlines
accordingly, until we had what almost matched exactly the CAD layout. Our goal
was to minimize the cuts and the severity of the cuts. The thick piece of
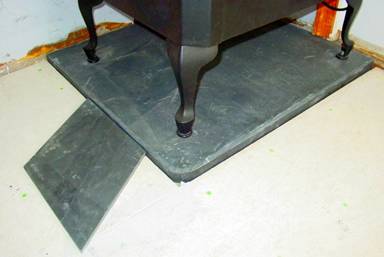
slate that the corn stove was on had a rounded corner, and the cut for that was
going to have to be done with some finesse, so we had to make sure that that
cut was going work out beforehand.
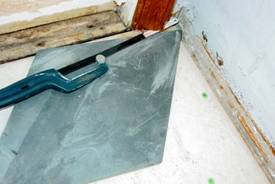
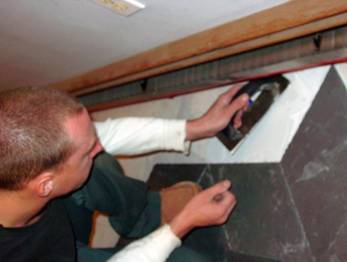
Cut the doorjambs
At this point, you need to cut the doorjambs before you
start laying slate in the wet adhesive. Take a look at all of the doorjambs
that lead into the room. Is there space at the bottom to slide the slate
underneath? Take a piece of waste slate or something hard that has at least the
same thickness, and put it down next to the base of the jamb. [see the pics for
this view]. Use the hacksaw with a nice long blade to cut away the bottom of
the jamb. Here’s where you sweat and feel your arm muscles that you forgot you
had. You will be surprised at how easily this goes and the piece(s) come out.
Once the bottom of the jamb has been cut away, you should be able to slide the
slate underneath the jamb, at a slight angle even, creating a clean,
professional looking edge. Repeat this step for every facing jamb in the room. It
won’t hurt to cut off a bit more thickness than the slate, because once you
have the wet adhesive down, and you find a slate won’t get under there like you
thought, you are pretty much hosed, and a re-cut of the jamb will be next to
impossible then. You should plan that the slate you use for these pieces may
be a little thicker than what you anticipated, so give yourself some room with
the jambs, or you will be in a jamb! You may also need to make sure that all
of the baseboard and quarter round trim is taken up from the perimeter of the
room. If there was carpet installed involved, then you will also need to take
up the tack strip from around the edge or just temporarily fold the carpet back
and secure it.
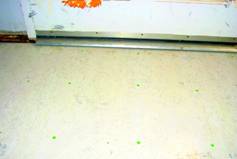
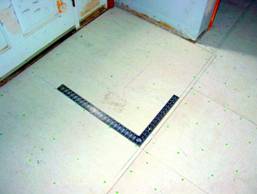
Lay the lines
Once the subfloor of backer board was installed, we scribed the centerlines on the backer board with a heavy pencil (you could have used a chalk line, but this room is so small, that we didn’t want the chalk mess etc…). One hint here, since this foyer is entered from three sides, we made sure that the long sight line, viewed when looking at it from the kitchen or living room, was parallel to the back wall. So we used the back wall as the reference, from kitchen to living room. This way, when you look down at the floor, all looks parallel and perpendicular to that wall. It could have been that the other walls were not quite square etc. to that back wall, and if we would have used another wall or edge as the parallel, it could have put the longest line from the kitchen to the living room a bit askew, and you would have seen that as a vanishing point and would have made the floor look crooked, so we were sensitive to that particular view.
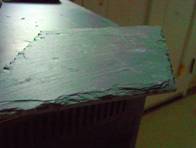
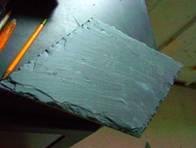
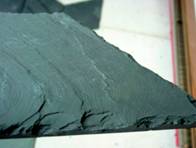
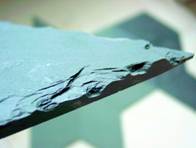
Inspect Your Slate
With most of our slate pieces, there was slight differences in hue and color
that occur with each piece. Some pieces had some striations of varying patterns
(variegated) that you may want to consider in the overall layout, you most
likely don’t want to have all these pieces end up in one area, you should mix
them up a bit for a random look. With this diamond pattern, you will find that
your eyes will play tricks on you, and even the varying lighting of night
versus day, you will always see something different each time you look at it,
so don’t get too carried away with the differing patterns etc. of the slates,
put that in God’s hands and just go for it, lay the pieces, it will turn our OK.
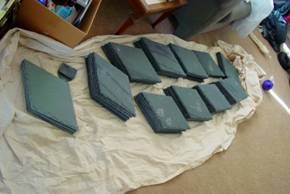
We pulled up the dried laid pieces and set them aside on stacks of five or
six. Some of the pieces that has the tips broken off we set on their own
stack, we would use these pieces for the cuts we needed later on, or, where the
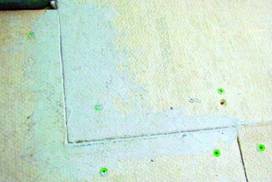
piece would be hidden under a jamb or so. These slate were prepared by
Capozzolo to be butted up against each other, with nary a gap to be found.
That mostly held true, with just some pieces actually fitting better than
others, so we just decided to not make a perfect layout dry first, and marking
the pieces accordingly, we decided to just lay it as we went, picking the
pieces at somewhat random.

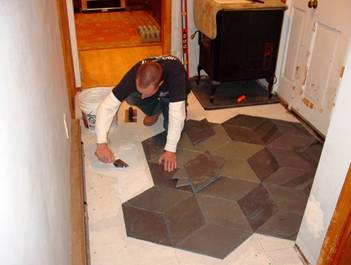
Apply the Adhesive and set the Slate
We agreed early on that we were going to use a ready-mix adhesive instead of
mixing dry thinset or the like. It was a bit expensive, but well worth it,
especially when you don’t do the whole job at one time, and you plan on doing
it over the course of a few weeks like we planned. Also, it was nice that the
same adhesive was used for the backer as the slate. A test of the adhesive on
the slate was done by Charlie before we set the slate, just to be sure the
adhesive we picked would work out. What we planned was to start with the green
star, set that, let it cure overnight, and then proceed, we didn’t want to go
full bore on the whole floor, after all, this was not done before on this large
a scale. This also gave us a chance to see how the adhesive would work out and
how much extra thickness we would get. We ended up doing the star and a few
pieces around that, just to get the feel of it, and it seemed to be working out
OK. After a few days, we got back to laying the rest of the large pieces. So
far, we didn’t make any cuts, we saved all the cutting for last. We made sure
to leave some room around the jamb pieces, so we could install the cut pieces
without getting hung up on an already installed slate, this is where the room
you leave under the jamb comes into play.
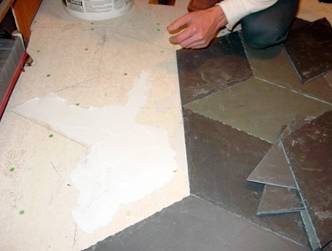
We used the trowel to spread the mortar in small sections and set the slate fairly
quickly. You need to take GREAT CARE not to get any of the adhesive on the face
or edges of the tile, as it is WHITE in color and can be difficult to clean off
once it dried. We initially worked slowly with our centerlines, making sure
that we were straight. Once we let the star dry, and we got back to it, we had
to make sure the star pattern repeated uniformly. The gap must be near zero and
the slates must mesh together nicely, or your pattern could end up running
crooked etc. For the second round of laying, we ended up marking the backer
board with the outlines of the slates, so we didn’t overshoot with the glue too
much. You have to pick up the excess glue when you are done with those pieces
that are near the end or the cutouts, this is where the triangular trowel was
helpful as well as the 1” spackle knife. Once we let that cure for a few days,
we came back to installing the cut pieces. For this, we applied the adhesive
to the backs of the slates directly, instead of to the floor, it was much
cleaner this way, and we didn’t make a mess of things. The best thing would
have been if we could have found an adhesive that was slate colored, instead of
white, then we maybe could have done different with the gluing process.

Cutting Slate Tiles
Here’s where the things I learned with the wet saw will help you if you decide to go the slate route. The blade in the wet saw I used was 7” x 5/64”. This thing can cut with such precision, you won’t believe it at first. I was able to make cuts with this that you couldn’t even do with wood or other materials. To make the lines nice and the edges but against the slate under the corn stove, I was able to take off a few thousandths of an inch at a time, half the width of the blade was par for the course. Most of the time the saw cut straight as an arrow, depended if you tried to muscle the slate through the saw or not. Slow and steady are in order here. I found that by keeping the blade guard up in the air a bit, I could watch as the blade cut the slate and make sure I was on track. What I did was to mark the slate for the cut with the black sharpie. When you turn on the saw, it throws a line of water out. I used this to my advantage to make sure I was lined up with the blade for the cut. What happens is that the line of the sharpie is waterproof, so, when you fire the saw up, and you put the slate in the path of the blade, it throws out an invisible line of water, down onto the slate, and all you need do then is make sure the water line matches with your sharpie line and you know you are lined up with the blade and all you need do is to push the slate into the blade slowly and make sure you stay on track. This is the best trick I found for the cuts, and they come out perfect, you don’t need a fence or a guide etc., this will work, for sure. To make the rounded edge for the radius to go around the slate under the corn stove, I moved the guard away a bit more, and I angles the slate to be perpendicular to the blade, then I worked the slate into the blade slowly and smoothly until I had the round I needed, I did use a black sharpie for this also. It’s amazing, but even if you cut on the topside or the bottom side of the slate, the sharpie marks somehow seem to disappear after the cuts and when the slate dries, so you don’t see your lines any more. The wet saw is messy, so do it outdoors. I set mine up on some sawhorses, to put the bed of the saw at a good height where I could see the lines and not break my back, and where the runoff water won’t damage anything below. You will have to change the water often, so keep an eye on it, you will know when it needs changing…

Sealing the Floor